Would you believe me if I told you this was among the most challenging panini I’ve posted thus far?
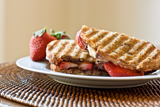
Before I explain why all the fuss, I’ll first let you in on what you’re looking at. We’ve got homemade peanut butter, homemade strawberry jam (my first jam ever!), and fresh banana grilled on sliced buttery brioche. Luxe all the way!
 Through My Lens is a blog event that my friend Kristen (of Dine & Dish) recently launched in conjunction with her new food photography blog, Culinary Snapshot. This time around participating bloggers will be posting their best shots of peanut butter and jelly sandwiches. As someone who photographs sandwiches on a pretty regular basis, I thought this event would be right up my alley.

Ideally, a simple sandwich such as PB&J would be equally simple to photograph…but au contraire. We get excited about how PB&J is going to taste, but I’m afraid there’s generally not a lot going on in the looks department. My approach to making PB&J look appealing on camera was threefold – 1) use extra-special ingredients, like my own homemade peanut butter and jam and a brioche loaf requisitioned from my local bakery, 2) place emphasis on the “ooze factor” and 3) Photoshop, Photoshop, Photoshop.

For details on how I captured and edited these photos, be sure to check out the Through My Lens roundup, which will be posted on Culinary Snapshot on September 10. In the meantime, enjoy the recipe below!
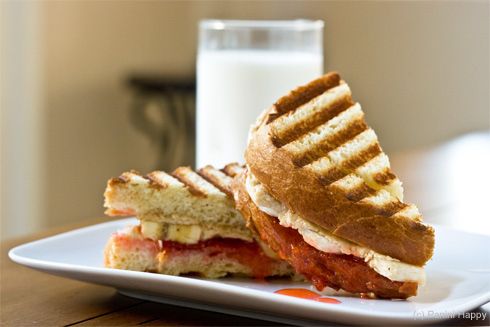
PB & J (and B!) Panini
INGREDIENTS:
Brioche loaf, sliced thickly (I called my bakery 24 hours in advance and they made one for me)
Homemade strawberry jam (see recipe on my other blog, Cooking On the Side)
Homemade peanut butter (see recipe below)
Sliced banana
DIRECTIONS:
Preheat the panini grill to medium-high heat (375°).
Spread jam inside one slice of bread. Top with banana slices. Spread peanut butter inside another slice of bread. Bring the two sides together to form a sandwich.
Grill 2-3 minutes until the bread is toasted (the brioche will brown rather quickly). Serve immediately and enjoy!
Homemade Peanut Butter
INGREDIENTS:
Adapted from Joy the Baker
1 1/2 cups roasted unsalted shelled peanuts
1 teaspoon honey
1/4 teaspoon salt
DIRECTIONS:
Place peanuts in the bowl of a food processor with blade. Make sure the lid is on tight and turn on the food processor. Nuts will transform from coarse to finely ground then begin to form a paste. Scrape the sides of the bowl as needed. Process until the peanuts resemble a thick, but mostly smooth, and shiny peanut butter, about 4 minutes.
 Panini Happy, online since 2008, is more than just a sandwich blog. Here, you'll find hundreds of my original
Homemade Peanut Butter AND homemade jam? You have gone above and beyond here, Kathy! It looks delicious and your photos are always fantastic.
Thanks so much for participating!!
.-= Kristen´s last blog ..Clicks 4 A Cause (Recipe – Zucchini Bars with Cream Cheese Frosting) =-.
Thanks! And thanks for hosting such a fun event!
oh, i just fell in love <3
.-= dani´s last blog ..#67) Indulgent PB Cookies =-.
I love the idea of a sweet Panini! Beautiful photos too!
.-= Cookie´s last blog ..Hot Pastrami Panini =-.
Now — PB&J with banana. Not MY favorite combo, but Peef would totally dig this.
What a fun event… I used to think photoshop was cheating, when it came to good food photography… but I’ve learned my lesson! Great shots.
.-= lo´s last blog ..Inspiration Sandwich: Tomato with Provolone & Hot Peppers =-.
Photoshop is vital! Fake food? Now that’s cheating. Hard to compare with the real food stylists.
Now that’s what a pb&J should look like!
The blog looks so much fun. Such a great idea.
I love PB & J & B. Best sandwich ever. This looks perfect. I might have to make one for myself tomorrow 😀
.-= Sagan´s last blog ..Day 15 of the Vegan Challenge =-.
Got my first panini maker yesterday and found your blog today. I am a happy camper!!
.-= BethieofVA´s last blog ..eggcellent chocolate chip cookies, no yolk =-.
Great entry, Kathy! The shot is fabulous! That touch of dripping jelly is ideal, you couldn’t have planned it better!
.-= Sandie (Inn Cuisine)´s last blog ..A Must Make! (Recipe: Snack Mix Bars) =-.
This is a panini to make for my grandson. He will love it!
.-= Kim´s last blog ..Peach Pound Cake =-.
Looks delicious!
.-= Chelsea´s last blog ..Great Gifts For 2 Year Olds =-.
I do love a good PBJ and your photos look wonderful. You always do such a great job with your photos, always so crisp and clear!
.-= RobinSue´s last blog ..Bulgogi Tacos with Spicy Slaw =-.
Kathy, can you tell me more about your photo technique? What is the white foam board for? That sounds like something I can afford if it would help me! 🙂
.-= Maris´s last blog ..Food Bloggers Take San Francisco: BlogHer Food ’09 =-.
It’s definitely an affordable technique – I think the board was about $3 at Michael’s! I often shoot photos near a big window for natural light, which is great for most of the object but leaves a dark area on the side that’s away from the window. The white foam board helps to reflect the light from the window and illuminate that far side. I just prop it up with whatever objects happen to be lying around the kitchen (today it was baby sandals :-))