A frequent question I receive in my e-mail inbox is for advice on using cast-iron panini presses. Having mainly grilled with electric grills, I haven’t been able to offer too many insights…until now. Thanks to the folks at Le Creuset, I’ve had the opportunity to try out one of their gorgeous presses (and, yes, I’ve got one to give away soon too!) and learn the ins and outs of this style of grill. If you’ve got a cast-iron press at home – or are contemplating buying one – read on!
Heating the Press
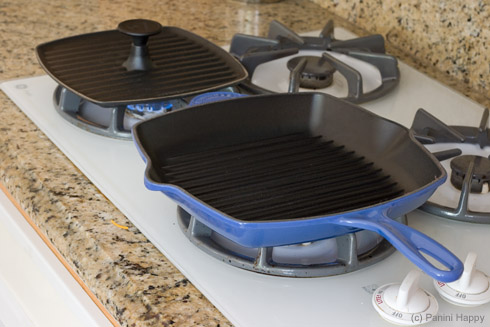
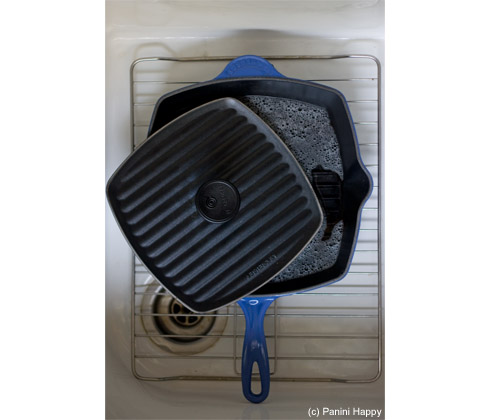
Cast-iron panini presses, in case you’re not familiar with them, are comprised of a skillet and a separate press. I’d often wondered whether the press is used merely as a weight or if you can actually use it as a heat source to grill on both sides (like with an electric grill). It turns out that, at least with the Le Creuset press, you do heat it separately and use it to cook as well as weigh down the sandwich. So I preheated both the skillet and the press over medium heat for about 3 to 4 minutes. Since the press was placed over direct flame I made sure there was no oil on it whatsoever, to avoid possible flaring.
I flicked a few drops of water onto the ribs of both the press and skillet – seeing the drops spit from the surfaces let me know they were hot enough and ready to start grilling.
Prepping the Press Surfaces
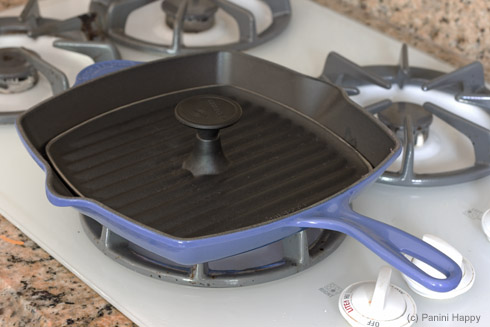
Once hot, I brushed the ribs of both pieces with a little vegetable oil. Then, I placed the press inside the skillet grill to maintain the two surface temperatures. Now that the press had oil on it I was extra careful not to return it to the direct flame. Again, the oil on the surface could create flaring if it were to make direct contact with the heat.
The first few times I heated the press and skillet I let them get a little too hot – I could see smoke from the oil starting to rise. Not a big deal, I just took them off the heat for a few minutes and allowed them to cool a little bit. Every stove is different, it just takes a little practice to get a feel for the right amount of heat.
Grilling
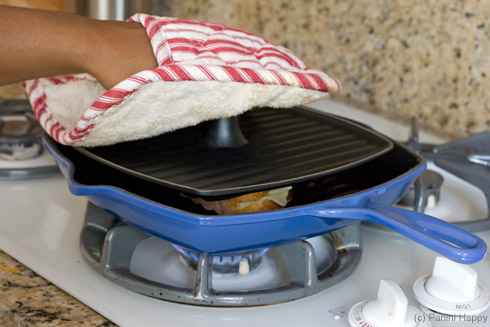
It’s showtime! I brushed a little olive oil directly onto the surfaces of the bread on my sandwich, both to minimize sticking and for flavor (the manual advises not to use olive oil or other flavored oils on the ribbed surfaces of the press and skillet themselves, as the oils have a lower smoking point and might cause excessive smoking or burning). Then the sandwich went into the skillet. I pressed down on it lightly with the press for a few seconds then left it in place to cook. (By the way, this was Nancy Silverton’s Grilled Cheese with Marinated Onions and Whole Grain Mustard sandwich – recipe to be posted soon!).
The Results
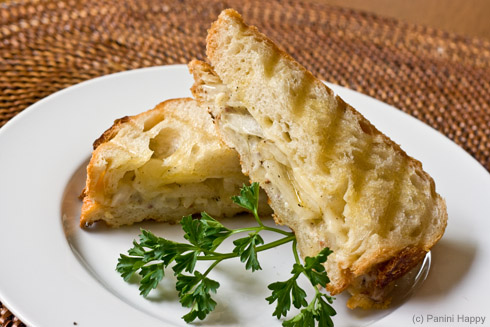
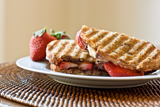
I got the same crisp-on-the-outside, soft-on-the-inside texture as I usually do with my electric grills. The cheese melted evenly and, thanks to the ribs on both the press and the skillet, I got grill marks!
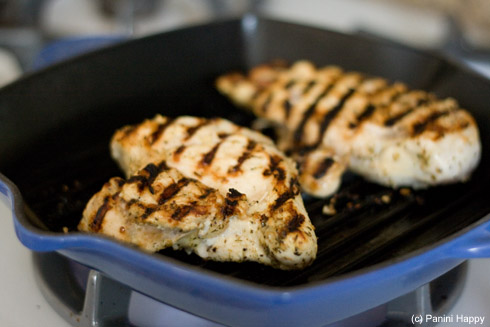
This type of panini press setup is ideal for grilling your sandwich fillings as well, such as the chicken breasts you see above (I made these for another recipe, also to be posted soon). I opted to use just the skillet on its own and flip the chicken halfway through, but you could also utilize the press to cook from both sides.
Cleaning
Good quality cast-iron equipment like Le Creuset can last you years and years…if you take proper care of it. I let the skillet and press cool down for a few minutes before rinsing, but I didn’t allow them to get completely cold or it would have been harder to remove the stuck-on food. Nothing stuck when I grilled the panini but, as you might imagine, there were some little remnants after I cooked the chicken.
I allowed the skillet and press to soak in some warm water for about 15 minutes and then cleaned them with the scrubber side of a kitchen sponge. I took extra care to remove any oil from the press, as I know I’ll be placing it over direct flame the next time I use it.
In summary
Making panini with a cast-iron press is pretty straightforward. It’s just a matter of determining the right amount of heat. The cast-iron holds onto the heat incredibly well and the press provides gentle, consistent pressure on the sandwiches. Readers have mentioned in the past that they enjoy bringing their cast-iron presses on camping trips, since you don’t need any electricity – that sounds like some pretty fancy campfires!
Thanks again to Le Creuset for providing this wonderful grill set for me to test drive. You can find them for sale at Amazon…or you can stay tuned for your chance to win one on Panini Happy very soon. 🙂
Whether your cast-iron panini press is made by Le Creuset or another manufacturer, I’d strongly recommend that you review your user manual before grilling.
 Panini Happy, online since 2008, is more than just a sandwich blog. Here, you'll find hundreds of my original


If only I have 2 of those…
Such a great post, Kathy. Maybe I’ll be lucky enough to win one in your upcoming giveaway. Keeping fingers crossed!
.-= Sandie {Inn Cuisine}´s last blog ..The Rule of 2: Two Riddles and Two Recipes (Strawberry Creek Inn’s Carrot Cake Muffins and Cream Cheese Icing) =-.
Thanks! I figured out the press warming after some mediocre top grilling. I have a Mario Ba-somebody cast iron pannini grilland the owner’s manual was skimpy. since i have a smooth top stove, and couldn’t see how to get all the oil off after a few uses, I put aluminum foil on the burner and the press on that. No flames yet. No smoldering. I will just keep trying. We are going to try grilling fresh fruit (blueberries, pineapple, etc w coconut oil to put over separately grilled chicken.
.-= The What If Girl´s last blog .. =-.
I adore my LC grill pan so this panini press sounds like a wise investment. I think I’d use it more than my electrical monster – something about using it on the gas stove sounds much more appealing to me 🙂
Great review and tips! I have a cast iron panini grill to (it’s my only one) because I was too cheap to buy the electric one! Plus I didn’t have the cabinet space for another small appliance. This LC one sure is much prettier than mine–may have to check them out when I’m at the outlet mall this weekend at my inlaws’!
BTW, I just put the “lid” directly on the pan (rather than setting it on a separate burner) while it heats. Maybe it doesn’t get as hot as your way but it seems to work for me and then I don’t have to worry about any flare ups. Oh, and the cast iron press is great to take camping too!
.-= Meal Plan Mom (Brenda)´s last blog ..Menu Plan Monday! Part Two…. =-.
Thanks so much for that great tip, Brenda! I didn’t try heating the press directly in the pan but it makes a ton of sense. Will try it that way next time.
This is a great post!! And such a yummy looking panini – I can’t wait for the recipe – your chicken looks delicious too … nice photos!
I have one of these. I’ve made some great steaks with it. Paninis were delicious, too, but your advice about heat level, etc. is helpful. However, cleaning it has been the biggest problem. So, no soap???
Glad it was helpful! I used regular dish soap – just nothing with a harsh abrasive.
I’ve used my LC grill pan in a pinch when I make panini. I don’t have the LC press, but have used a foil-covered brick for weight and then flip the sandwich to get grill marks on both sides. More frequently, I use my Geo Forman grill to make my paninis–not as heavy and a snap to clean.
Thanks for the detailed instructions!
I gotta have those too. It’s embarassing, I haven’t convinced myself buying one until now. 🙂
.-= kathy´s last blog ..Toddler Crafts-Newspaper Hats =-.
I would be making lots of panini with this ! Looks so easy to use!
I just got one of these for $1.50, new, but no instructions, at a garage sale! Thank you thank you THANK YOU!
Use parchment paper and no sticking. Wrap every thing in it. It also lets grill mark come threw.
Great idea! ~Kathy
I’d advise against the soak with cast iron, especially since you didn’t mention putting the iron back on/in the oven to remove any moisture.